
If you're anything like my husband and I, we eat yogurt like it is completely going out of style! We love it! After going to the grocery store and realizing that, between the two of us, we devour four large containers of Stoneyfield yogurt a week and taking a moment to add up the cost of that, I decided to look into making my own yogurt. French Vanilla is our favorite, but I was willing to make plain yogurt and flavor it on my own if it meant that it would save us a pretty penny. It was either that or stop eating it, and considering how nutritious yogurt is, and how much we love it, I knew that my only options were to continue spending the $15-$20 a week on yogurt of make it. I chose the latter.
I'll admit, I was a little skeptical at first. I was worried about executing the recipe incorrectly and spoiling an entire batch, then, unknowingly ingesting nasty, spoiled yogurt. The thought was enough to gross me out, but I suppose not enough to scare me away from this wonderful creation. After doing a little bit of research and realizing that there are a ton of ways to make yogurt and every website tells you to do something different, I settled on my own sort of recipe. I suppose having a yogurt maker would make this process a million times easier, but I don't have one, so I will share with you all what I do to successfully accomplish making yogurt. If you're curious about the cost effectiveness, allow me to save you the time it takes to read this recipe and just add this tidbit in now. Brace yourselves, it's epic savings. For four quart containers (yes, I make one whole gallon at a time!) the only cost is one gallon of milk and one small cup of organic yogurt (only needed the first time you make your yogurt. After the first time, you will use your own culture). I believe that comes out to less than four dollars. Yes people, less than four dollars for one gallon of yogurt. Now that you all are completely amazed and will be jumping up to make yogurt (one can dream, right?), let me wow you even more and let you in on how easy it is to make!
First, take one gallon of milk (I use 2%) and heat it to 180 degrees. I use my crockpot. It takes several hours to heat if using the crockpot on high, but I find I don't have to worry about scorching and can easily do other things while I wait for it to hit the proper temperature.
After the milk has reached 180 degrees (this breaks down the milk proteins), turn off the heat and cool to a nice temperature between 115-120. Any hotter than 120 degrees will kill the live culture bacteria in the yogurt you will add and any cooler than 115 degrees will not be warm enough to grow the culture.

Once the desired temperature is reached, then take a few spoonfuls of your yogurt culture (preferably organic yogurt) and drop them into the milk. Whisk the mixture so it is nice and smooth. This won't take much effort.
Finally, the fun part begins. The mixture must stay warm for approximately 6-8 hours. I do this by turning the crockpot on warm for only about 30 seconds (just enough to take the chill out of the crockpot outer piece). Then, place the crockpot lid on and cover the whole thing with a ton of think, warm blankets to insulate the concoction. Be sure you have turned the crockpot off or you will ruin the entire batch. My favorite part comes next: Go to bed for 6-8 hours!!! Yep, go to bed and let the yogurt do its thing. In the morning, you will find you have a huge batch of yogurt! voila!
Before you do anything with the yogurt you've created, place the entire container in the fridge. DO NOT scoop it out of the container you made the yogurt in or it will not set correctly. Only after the yogurt has completely cooled for a few hours, can you scoop it out and put it in smaller, easier stored containers. I like to use glass Ball jars so I can properly sanitize them and reuse them.

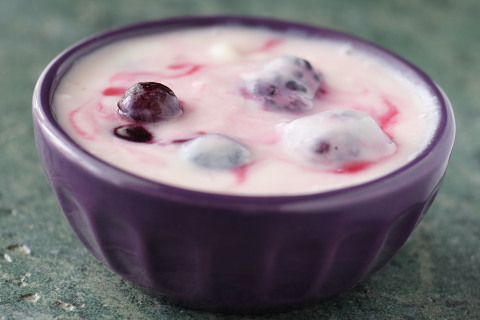
Finally, feel free to mix in some vanilla extract (to taste) or a small amount of honey or sugar. I don't add sugar as I want this to be a super healthy treat, but I do add vanilla and honey. You can also add fresh fruit in individual servings when you are ready to eat it or granola. All are healthy and yummy options! Enjoy!
Just a few more things. After you have made the yogurt and cooled it, you may notice and clear or slightly yellow liquid on the top of the yogurt. This is called whey. It is actually very nutritious and can be mixed into the yogurt. However, if you prefer thicker yogurt, you can strain the whey off with a cheese cloth.
I have learned that the longer you continue to use your own yogurt culture to make more batches of yogurt, the thinker the yogurt becomes. After using the same culture a few times, you will see a difference. Each batch of yogurt lasts at least two weeks, but you can still safely use the culture for your next batch at that two week mark. I recommend this!
Feel free to ask any questions! I've been doing this for several months and find it to be simple, money-saving, and delicious. Enjoy!
No comments:
Post a Comment